
Create your own Marquee Letter with the DCWV 16" x 20" Large Format Stacks
You know those 12 x 12 stacks from DCWV that we all love, well just when you though that they couldn't get any better those crafting guru's at DCWV have brought out 16" x 20" stacks, yeah that's right!.
Just think of the possibilities for creating large scale projects. If you have an electronic cutter like a Cricut or Silhouette then you are going to love love love them. These pads are available now at Joann's and coming soon to other retailers. Check out the DCWV website for stockist information.
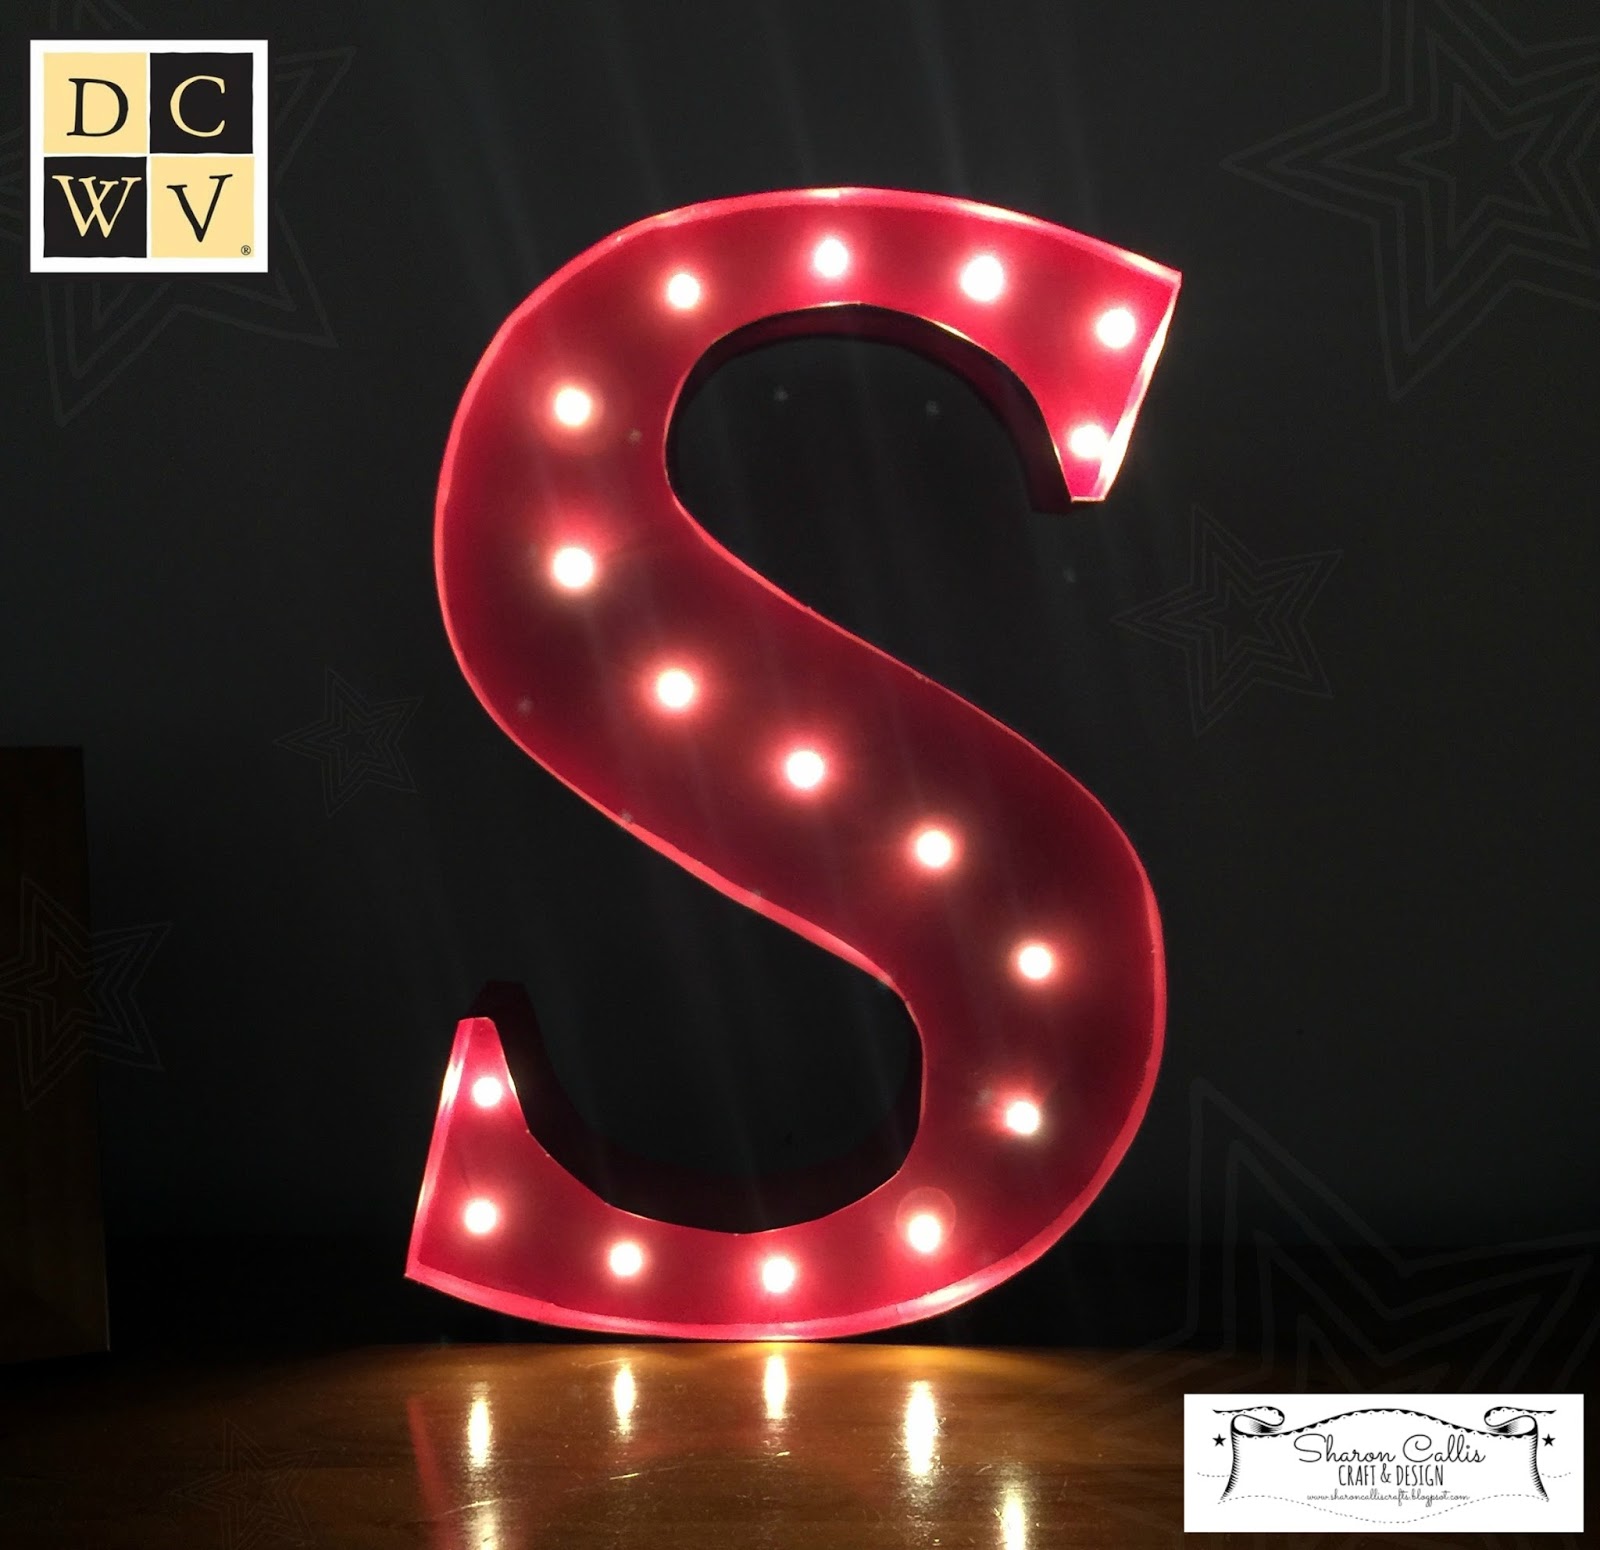
I have made a project today using my 16 x 12 primaries stack, my own marquee letter and it's HUGE, measures 16" tall. Take a look at my quick tutorial.

Products Used
Silhouette Cameo
Cool Melt Glue
Battery operated lights
How it's made
Start with choosing the pad and color you prefer, there is a lot to choose from. I chose red.

Lay the page on the cutting mat and trim away the excess.

From the built in fonts on my PC, I used an S, create an outline with a solid cut line, the inner line is perforated and the holes approximately 1.5" apart for the lights.

Cut out the front of the letter first.

Cut the tabs up to the perforated line.

On the screen flip the letter over and remove the holes for lights and cut out.

Repeat the process for both sides of the Marquee using rigid card stock, this will give more support. I used the backing card from my pads.


Run the pieces of cut card through the Xyron Creatopia.

Place them flat on the desk and then place the cut letters over the top, ensure that the holes line up.

For the edging cut four 4" x 20" strips.

Mark along the length just over a half inch from the edge.

Use a scoring tool and a ruler to mark along the length and create a fold.

Apply the Xyron High Tack tape to either side of the crease.

Then start at the top of the letter and stick the tabs along the underside of the crease, leave 1mm to allow for the folding.

Once the taps are stuck in place then you fold over the top to secure.

Continue all around to form the front.

These lights have been recycled from Christmas. I removed the caps to expose the LED's and make them brighter.

OK this looks messy but hey it's going to be hidden never to be seen again!. I cut a cardboard tube into pieces as supports and pushed the lights into the holes and secured with the cool melt glue. For added support I also applied the cool melt glue around the inside edges.

Test the lights and if all works well then add the back of the letter using the same method as the front, make sure to cut a little hole for the cable so that the battery pack can be fixed to the rear of the Marquee letter.

Here it is and I'm pretty happy with it !, loving these new large format stacks!.


( DCWV products were provided as part of the DCWV Design Team )
I'm also on facebook if you want to stop by and say hi !
See you again soon.


Very, very impressive! I am stopping by from the DCWV blog. Great tutorial!
ReplyDelete