
Xyron 30 Days of Christmas 'Little Christmas Robin'
.jpg)
Ohh not long now until the big day, my decorations are up and the Santa Lists have been sent. I wanted to make something a little ermmm quirky for a table centre piece this year and a Christmas memory I have is from waaaaaaay back in the 80's (yikes) when at school we would make Christmas logs with plastic robins, cotton wool and horrid damp half cut logs !. I'm putting my own twist on this tradition and making my own robin and log from card stock. I admit when I started this project I wasn't too sure how it would turn out ( I ain't no Diana Beltran Herrera) but the end result was worth the effort. I have put together a tutorial for you.


Supplies
Xyron Teresa Collins Liquid adhesive
Pot Pourri Cones
Tim Holtz frayed burlap ink pad
brown flocking Powder
Wire
Snow Spray
Spray Varnish
How it's Made
There was a lot of trial, error and winging it (excuse the pun) for this little birdy so bear with me !, I made a small bird but you can make it any size, all you need is three different sized foam balls.
Cut the large and medium balls in half, you will use one half of the medium ball on the base and half the large ball on the top. Match the edges at the rear and trim the front until it is the same width of the base, this will give you a flat 'breast' for the robin.

Glue the halves together and using a cocktail stick add the 'head' towards the front.

OK lets give this little birdie some feathers!, I used the cream linen patterned paper.

Cut into narrow strips.

Snip into 3/4 pieces, round and shred.

layer on the base of the 'bird'.


Now for some glitz !, i Loooove 'The Shimmer Stack' and used the brown for the wings and back. Again cut into narrow strips etc.

Add some tail feathers then start with the layers from the base.

Work your way up to the shoulders leaving a gap for attaching the wings.

Next cover the head on the back and sides.

Leaving space for the facial and breast colour.

Looking good!

Cut some of the grey into strips.

add a band of grey around the front of the head.

For the wings cut strips but do not shred, layer together.

Add to the sides, cover with some brown ''feathers' to blend in, then two layers of grey 'feathers'.

Now for the final set of 'feathers' use the orange/copper shimmer paper.

Attach the 'feather' around the edges and work towards the centre. Add some black gems for eyes and make a beak from the grey shimmer stack.

A birdy needs claws so I did make some using card stock but they weren't sturdy enough for what I had planned so plan b was to use wire. But since it was 2am and I was all out of thick wire I improvised and use regular beading wire.


Yep they look totally ugly but next is the flocking.
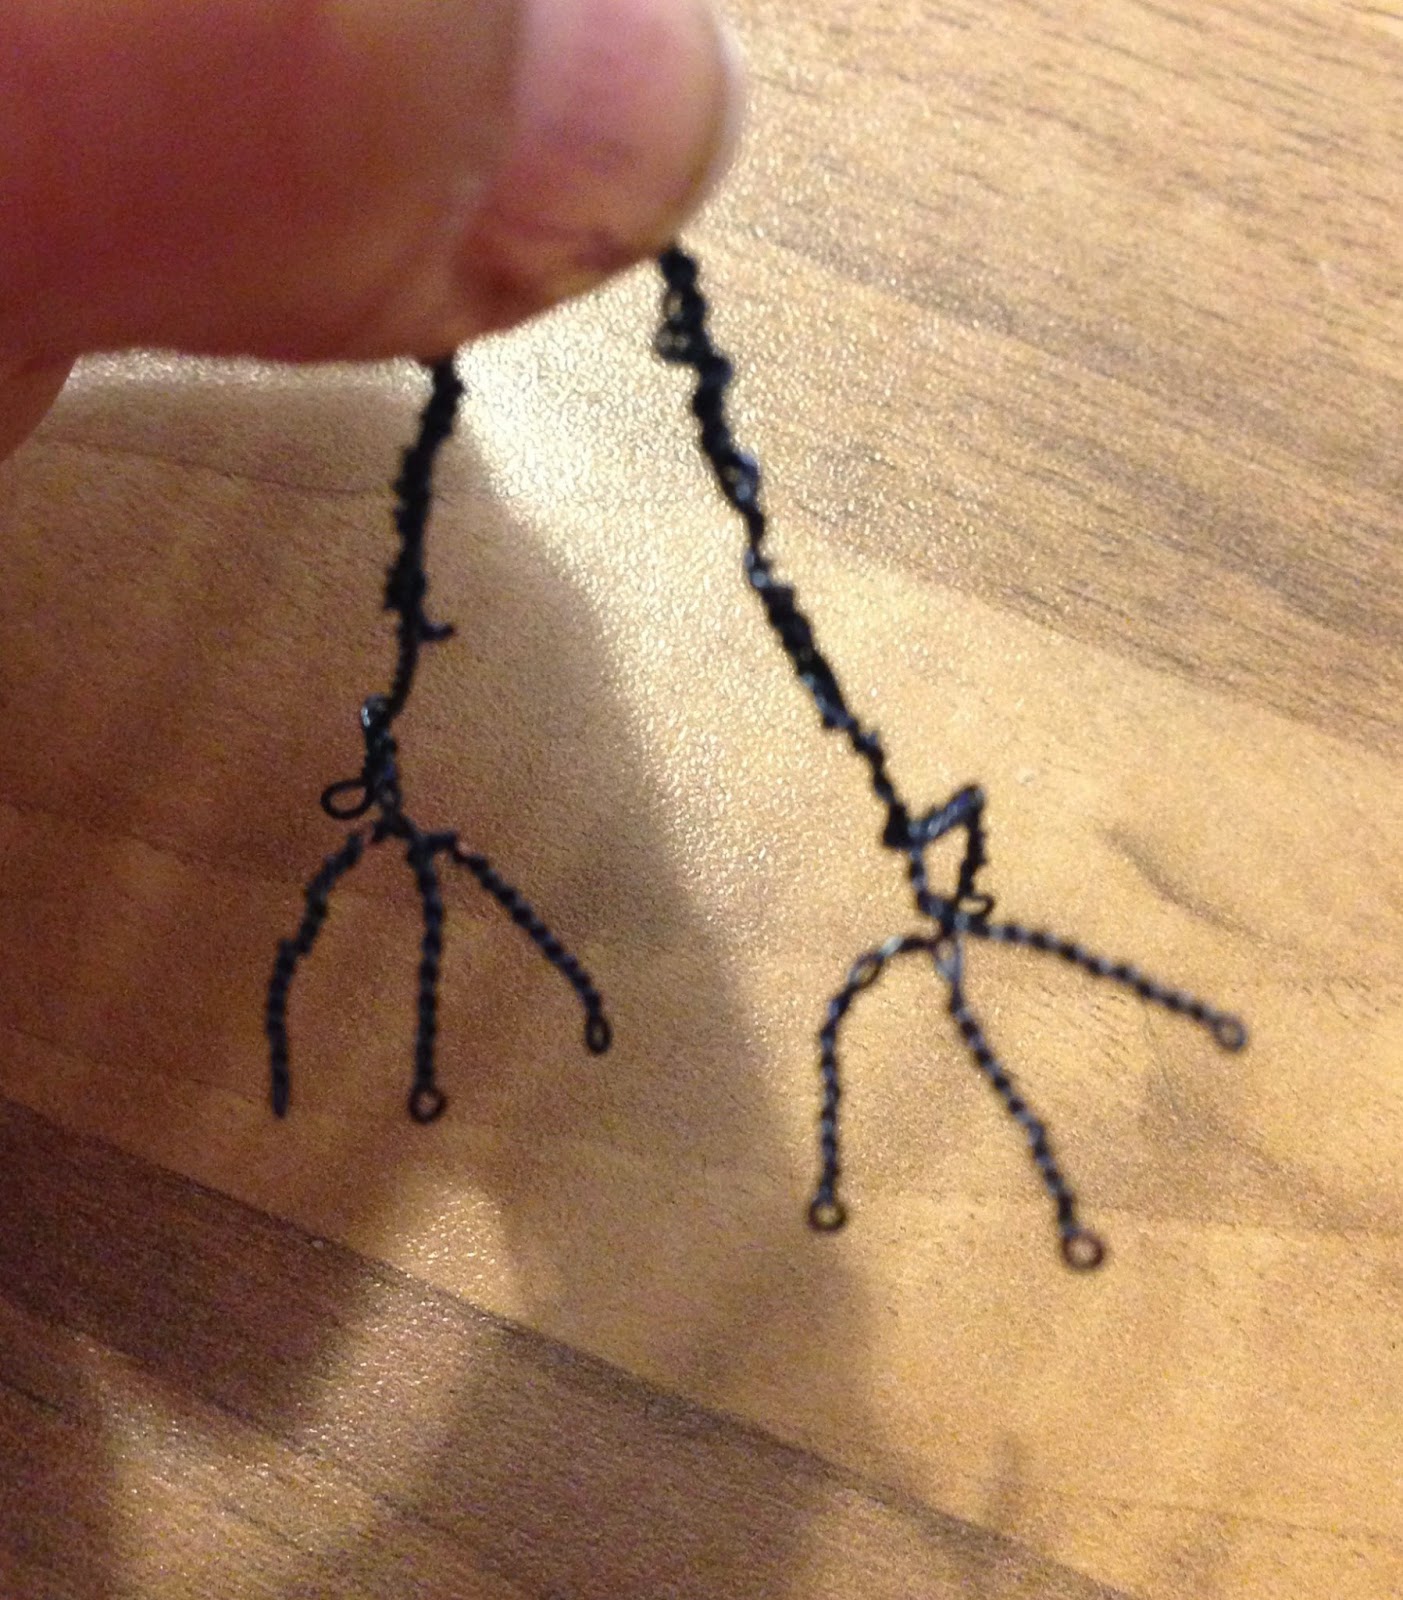
Cover the wire in glue and then dip in flocking.

Punch holes in the bird and glue into place.

The log was so quick to make, the cardboard tube was 4" and cut to a length of 8", next split in half slightly off centre.

Mark two pieces of card by tracing the inside edge of the curve, cut flaps.

Use Xyron High Tack Tape on the inside of the curve to secure the end panels.

Trim the wood effect paper from the Christmas Memories Stack to fit.

Emboss ( if like me you only have a small embossing folder just move it around the sheet and emboss), add more texture using the ink pad.

Run the larger panel through the Xyron 9" Creative Station.

Run the side panels through the Xyron 5" Creative Station.

Apply the side panels first and trim, next apply the top panel.

And then decorate!!!, I sprayed some snow spray first, when dry apply a spray varnish and then the other elements.

Thanks so much for stopping by today, make sure to follow Xyron on Facebook for inspirations and giveaways.
I'm also on facebook if you want to stop by and say hi !
See you again soon.


Incredible job.
ReplyDeletethat is ah-maa-zing!! wow :) thanks for sharing!
ReplyDeleteYou have a ton of patience. The tutorial looks fabulous! I just love what you did. BL
ReplyDeleteWow that is amazing! So much work. BL
ReplyDeleteWhat a fun project which looks just stunning in the end. I must book mark this one for sure and if I ever get the time give it a whirl. Thanks for the get instructions.
ReplyDeleteOh wow how AMAZING!
ReplyDeleteYou did a wonderful job, just love it!
Elaine (BL)
ExpressionsByElaine.blogspot.com
Holy WOW. Such an amazing project. The time and creativity this must have taken just blows me away. You are one talented lady. :)
ReplyDeleteTammy S.
BL