Xyron and Kaisercraft Blog Hop
Welcome to the Xyron and Kaisercraft blog hop, all this week the Xyron Design Team will be partnering with the AMAZING Kaisercraft to bring you some inspiration and tips. I'm super excited to share with you today three projects that I have created. The first using the Kaisercraft 3D Wall Art - Bird on Twig pre-cut wooden shapes, second is an altered frame and third a Friendship Greetings Card. Below are some step by step instructions on creating the wall hanging and frame, I hope it will inspire you to try and make one yourself using Xyron and Kaisercraft.
BIRD ON TWIG
Products Used
Kaisercraft 3D Wall Art - Bird on Twig (SB2232)
Kaisercraft Flora Delight Collection
Kaisercraft Paper Blooms
Xyron 9" Creative Station
Xyron Glue Stick
Ranger Liquid Pearls
docrafts Vintage Notes Crochet Flowers
Clearsnap green chalk
Hot Glue Gun
How It's Done
Before I started the main assembly of the Kaisercraft 3D Bird on Twig I covered the main front panels with the background paper.
I ran the wooden strips through my Xyron Creatopia with permanent adhesive
I then adhered the strips to the back of the paper and cut around the edges. To assemble I lay the panels face down and evenly spaced on a mat and used the hot glue gun on the back bars to hold in place. I used the hot glue gun for speed but if you have time then liquid glue works too.
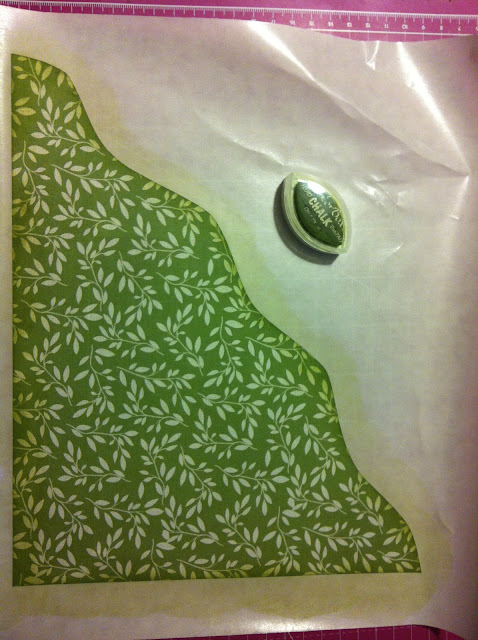
Flip the panel over and distress the edges using a fine sanding block. To add the 'Tree' first roughly cut the green leaf print paper in a wave pattern and run through the Xyron Creatopia. Using a green ink or chalk colour the edges.
Place on top of the backing paper and trim around the edges to remove the excess paper between panels.
To add the bird to the front, firstly run the wooden shape through the Xyron Creatopia and place onto the reverse side of your paper. Flip it over and trim around the edges with a craft knife and distress the edges using a light sanding block.
I used the Xyron Glue Stick to adhere the bird to the front of the project.
Now it's time for the fun part, adding the embellishments. I used the Xyron Glue Stick to hold the sentiment, Paper Blooms and Crochet in place.
To add a finishing touch and texture to the green leaf print I added the Ranger Liquid Pearls.
So there you have it, a super 3D wall art project, I hope you will try one for yourself. The other project is a simple and quick card for a friend
LOVE IS...
Products Used
Kaisercraft Floral Delight Collection
Kaisercraft Paper Blooms
Kaisercraft Wooden Letter Words
Kaisercraft Floral Delight Collectables
Xyron 5" Creative Station
Xyron Glue Stick
Quick Quotes Purple 'Powder Puff' Chalk
Hot Glue Gun
How It's Made
Using the Quick Quotes Powder Puff Chalk pad rub the raised edges of the frame all over.
I used the glass from the frame as a template for cutting out a base layer of white card, from this measure a layer of green card slightly smaller and cut out the 'Love' motif from a 12x12 sheet from the Kaisercraft Floral Delight collection. Run the green paper and the motif through the Xyron 5" creative station and layered together.
Place inside the frame.
Run the Kaisercraft Floral Collectables through the Xyron 5" Creative Station and put to one side ready for decorating the frame
The Kaisercraft Wooden letters are perfect for coloring, so I rubbed them lightly across the top with the chalk pad ready for decorating the frame
Start to layer the embellishments, then using the hot glue gun add the flowers and the wooden letters.
Friend like You!
Products Used
Kaisercraft Floral Delight Collection
Kaisercraft Floral Delights Collectables
Xyron Mega Runner
docrafts Vintage Notes Crochet Flowers
socrafts Vintage Notes Lace Border


Gorgeous
ReplyDeleteBeautiful projects. That bird on a twig is so cute and the fence is adorable. The frame is adorable - love the colors.
ReplyDelete